


Before you put your lenses in for the first time:
- Always keep your glasses with you. You may sometimes need to give your eyes a break from your contact lenses and you’ll want your glasses handy.
- Stock up on contact lens solution. You don’t want to wait until the end of the day to find out that you’re out of solution. And never use water to clean your lenses! It can contaminate them and harm your eyes.
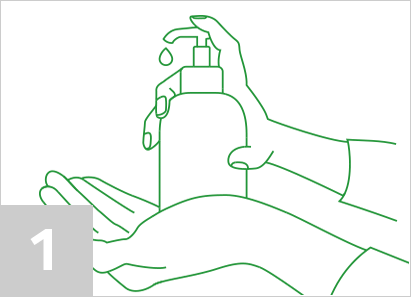
- Always wash your hands with a plain soap and dry them thoroughly first. This will make your lenses easier to handle and will prevent them from being smudged or contaminated with germs. Look for a soap that says “oil-free.”
- Don’t ignore discomfort. If your lens causes pain, this can mean a speck of debris is on your lens or another problem. Always remove the lens, clean and disinfect it, and check it for scratches or tears before reinserting it.
5 steps to putting in your lenses
Step 1:
Remember, always wash your hands first.
Washing your hands with an oil-free soap can prevent germs from getting on your lenses and also help keep them free from smudges or oily film.
Step 2:
Start with the same eye every time.
Just like lenses in your glasses, your left and right contact lenses are made differently to give you the best possible vision correction for each eye. Always start with the same lens every time so that you don’t accidentally switch them. Tip: If you’re right-handed, start with the right lens. If you’re left-handed, go lefty first.
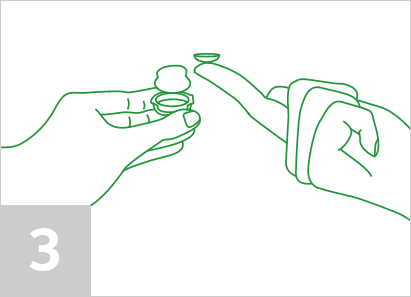
Step 3:
Scoop the lens out carefully.
Put the lens on the end of your finger and hold it up to the light so you can see it clearly. Is it curved upward like a bowl? Then you’re almost there! Check it for tears or scratches, clean and disinfect it with lens solution, and you’re ready.

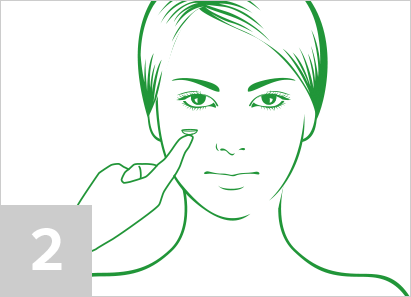
Step 4:
Insert the lens.
Use your free hand to hold up your upper eyelid. Use the middle finger of the hand holding your lens to pull your lower eyelid down. Holding the lens on the tip of your index finger, place it on your eye. Once inserted, look from side to side to position the lens over the colored part of your eye. Make sure the lens is comfortably seated on your eye, so it doesn’t pop out.

Step 5:
Now blink and you’re done.
Just blink naturally and take a look in the mirror. If everything looks and feels okay, enjoy your glasses-free, clear vision and go about your day!
Putting in contact lenses is not a natural thing to do at first. If you’re having trouble, remember these tips:
- Contact lenses can be sticky. If your fingertip is wet, your lens may stick to it instead of your eye. Try drying your finger on your wrist so that the lens will release easily. On the other hand, if your eye is dry, the lens may not stick to it. Use 1 or 2 rewetting drops in your eyes and try inserting the lens again.
- Be sure you’re keeping both eyes open while putting your lenses in. Closing one eye can be tempting as you try to focus on what you’re doing, but your eyes work together. Closing one will cause the other to narrow, leaving less room to get that lens in there.
- Pay attention to what your eyes are telling you. Discomfort can be a sign that your lens isn’t properly inserted, that there’s a bit of debris on the lens, or that your eye isn’t getting the amount of oxygen it needs. If you do feel discomfort, remove the lens, check it for tears or scratches, then clean and disinfect it and reinsert it. If discomfort persists, stop wearing the lenses and talk with your eye care professional.